
24 Manicure Hacks & Nail Polish Tricks For 2024
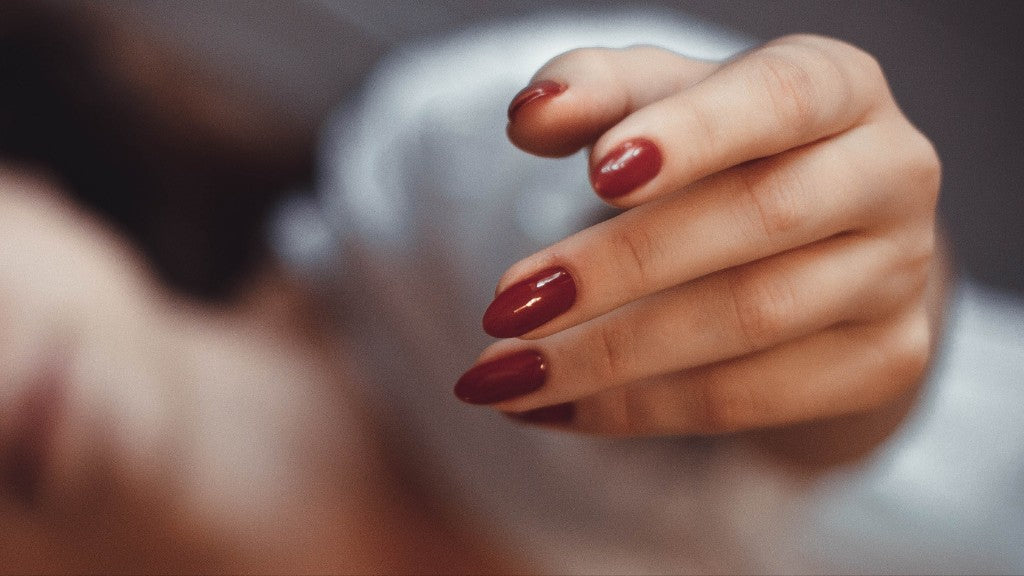
Getting your nails to look as flawless as possible with an at-home manicure is much easier than you think! The internet is filled with manicure hacks and tricks that are there to help you out with your salon-quality manicure that you can create from the comfort of your home. With this post, we have put together a list of 24 brand new manicure hacks and nail polish tricks for the year 2024! Keep on reading the post to get awesome and unique nail art ideas for 2024.
24 Manicure Hacks & Nail Polish Tricks For 2024
1. Grow Your Nails Faster With Hot Oil Manicure
A hot oil manicure can strengthen your nails and promote their healthy growth. You can easily do this luxurious treatment for your nails and hands at home. Just take a combination of some nourishing oils (i.e. Almond oil, castor oil or olive oil) in a bowl and add the content of 2 Vitamin E capsules in it. Warm it up in the microwave for a few seconds and then dip your fingernails in the oil mixture. You can keep them in the oil mixture until the oil has cooled down.
To finish off your hot oil manicure treatment, massage your nails with the leftover oil mixture for about 5 minutes.
If your nails are prone to chipping or breakage whenever you try to grow them, try using a nail hardener that would make your nails more resistant to breakage. Check out the Argan Oil rich DeBelle Nail Hardener to protect your nails and also to make them appear less brittle! It can be applied onto your nails before a manicure.
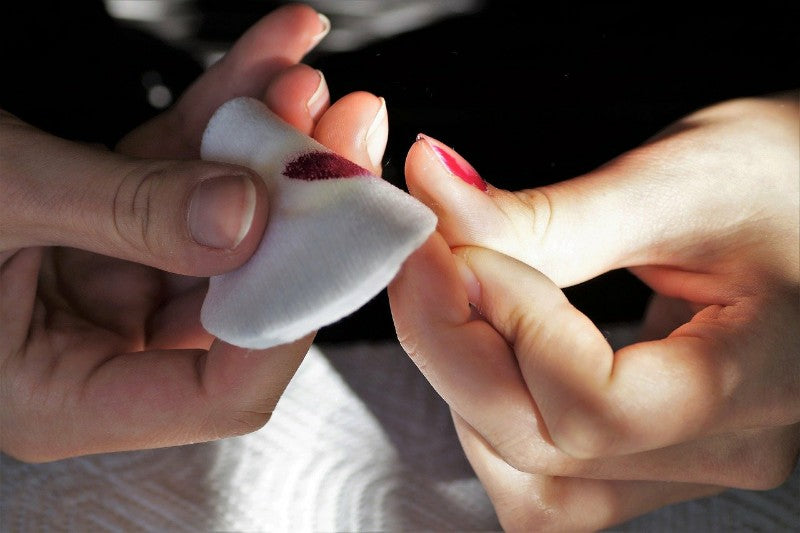
2. Use A Moisturizer or Petroleum Jelly Around Your Nails To Clean Up Excess Nail Polish Easily
A moisturizer or petroleum jelly can create a barrier between the skin around your nails and the excess nail polish that gets on your skin when you paint your nails. This way, the clean up routine after you are done with painting your nails becomes much easier! Just wash your hands or use a clean Q-Tip around the nails to pick-up the excess polish.
3. Clean Your Nails With Q-Tip Dipped In Vinegar Before Applying Nail Polish
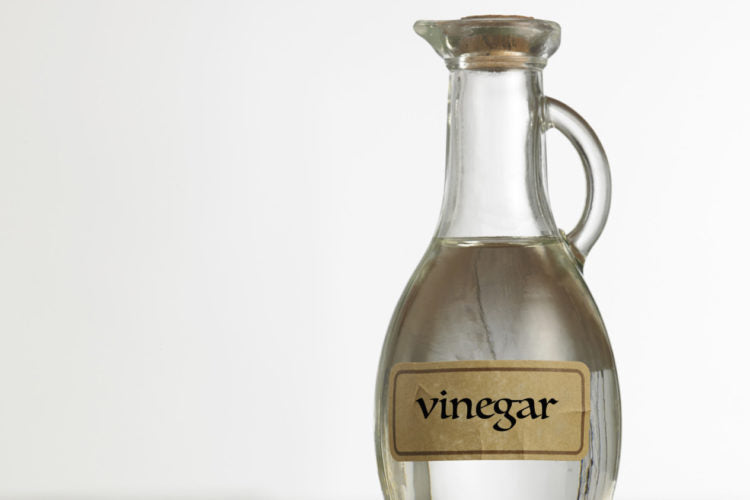
Any leftover residue from your previous manicure or a layer of dirt/oil on your nails can affect the longevity of your manicure! Your nail polish needs to adhere to your nails to ensure that it doesn't chip or fade away easily. You can make your nail polish last longer by cleaning the surface of your nails with vinegar before painting them. You can either use a Q-Tip to clean them or just soak your nails in a mixture of warm water and 2 teaspoons of vinegar for a minute. The vinegar will remove all the dirt and oil, making your nail polish stick to the nail surface better.
4. Use A Band-Aid for an At-home French Manicure
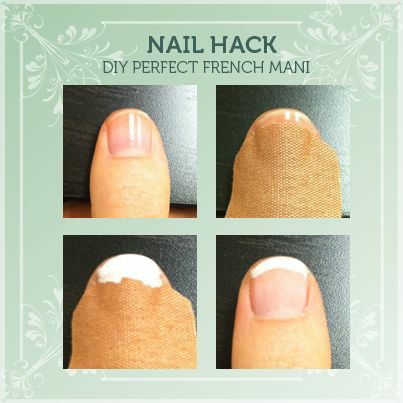
Bandaids have a perfect half-moon shaped edges to create a French manicure nail art easily at home. Here is how you can do a French manicure with a Band-Aid :-
- Paint your nails with a base colour
- Take a band-aid and run it on your hand for a couple of times to reduce its stickiness.
- Put the band-aid on your nails - leaving the white area exposed.
- Apply two coats of white nail polish (or any shade of your choice, French manicure doesn't always have to be with a white shade!) to the tips of your nails.
Your French manicure is ready!
Pro tip: to make your french manicure look "flawless", prep your nails with our DeBelle Nail Primer which will help you to smooth down the surface of your nails by filling in any ridges and making your nails look perfect!
5. Use No UV Gel Nail Polishes To Save Your Nails From Harsh Effects of UV Lamps
Nail salons make use of mini sized UV Lamps, also known as nail lamps, to cure or "harden" gel and acrylic manicures. This step not just hardens the manicure, but it also ensures its longevity. However, such manicures come with a lot of risks.
UV nail lamps are known to have carcinogenic risks and they may also lead to premature aging by causing wrinkles on your hands. Furthermore, the gel nail polishes used in such manicures don't allow your nails to breathe, causing discolouration of your nails and affecting their healthy growth. For the removal of gel or acrylic manicure, you usually have to visit the salon again since they can only be removed properly with a nail drill.
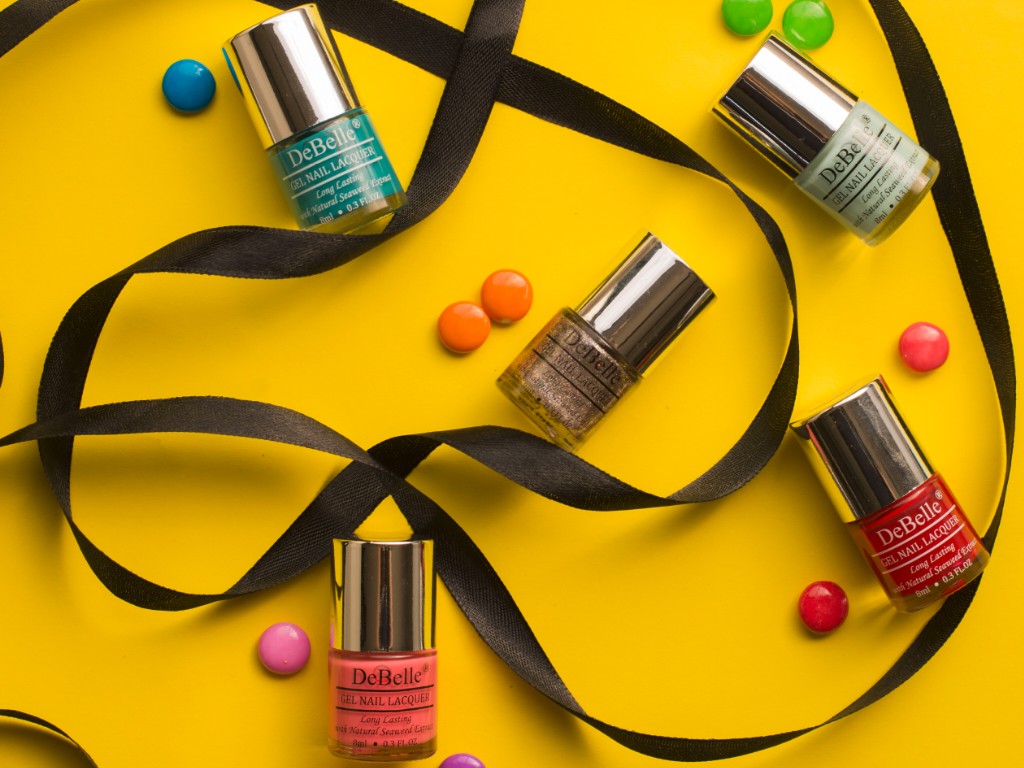
A simple solution to getting gel-like manicure without the use of UV lamps is a no-UV gel nail lacquer! Such lacquers dry off as normal nail polishes do, but they give a glossy and long-lasting finish like that of UV gel polishes. Get your hands on one-of-a-kind DeBelle Gel Nail Lacquers formulated with exotic seaweed extract that improves the health of your nails and allows them to breathe. They are available in over 50 shade options for you to choose from!
You may also want to read: What Is A 5-free Nail Polish?
6. Create Splatter Nail Art With A Straw
This cute and effortless nail art is full of colours and it can show off your artistic skills in the coolest way! Check out the tutorial for this nail art above to get to know how you can create this nail art look effortlessly with a drinking straw and your favourite colourful nail shades!
7. Revive Your Dull Manicure With A Sparkly Top Coat

Whether your manicure has turned dull after a couple of days or you are bored with it already, a thin coat of sparkly nail lacquer with holo glitters can instantly revive your manicure - and your mood! Take a look at our Shimmer top coat that has colour shifting holo glitters in different sizes.
8. Make Water Marble Design On A Plastic Sheet
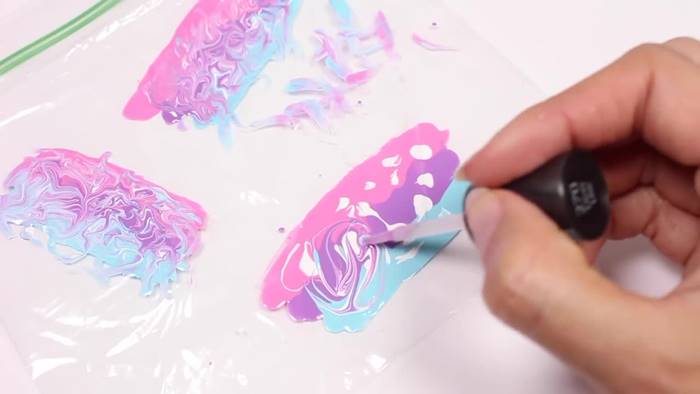
Water marble is a hard yet extremely pretty nail art technique! Water Marbling can give off unique designs every time, for each of your nails. However, if you are not quick while trying out this technique, you can end up with botched up looking manicure! For beginners, creating a water marble design on a plastic sheet to make nail decals can be much easier than creating the water marble patterns in water.
Also read: How To Maintain Healthy Nails
9. Use Wool To Create a Velvet-Textured Nail Art
Flocking powder especially made for nail arts is usually what is used to create velvet-textured nail art. But you can get a similar effect by using wool too! Here's how:-
- Take a piece of wool and fold it 7-8 times.
- Keep cutting it in pieces while folding the wool.
- Next, take a paper and start cutting extremely small pieces of wool over it. It should have a fine powder-like texture.
- Paint your nails in a colour that matches the wool's colour.
- Before the nail polish dries, sprinkle and press the "powdered" wool onto your nails evenly.
- Sweep off the excess wool with a fan brush.
Your nail art is ready! It may not be as long lasting as a real velvet-textured manicure created with flocking powder, but its elegance would surely leave everyone awestruck!
10. Quickly Dry Off Your Manicure With Ice Water
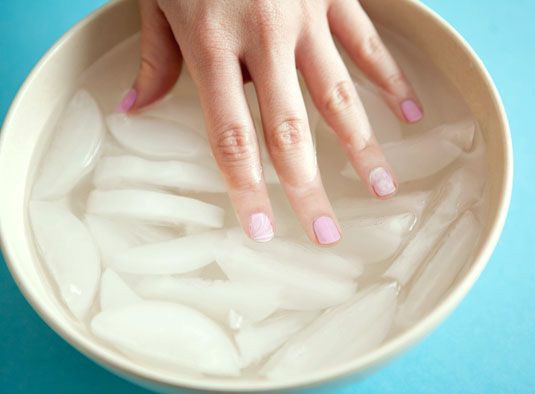
Soaking your freshly painted nails in ice water for a couple of minutes can dry off your manicure in a really quick way. You can also use a cooking spray on the nails to dry your nail polish faster.
11. Prevent Nail Polish Bubbles By Rolling Your Nail Polish Bottle Instead Of Shaking It
Once you are done painting your nails, you may have noticed small bubbles forming on your nails during the drying phase. This small mishap can surely make your manicure look bad.
There can be two reasons behind these bubbles forming up on your nails after painting them, #1 - painting over unclean nails and #2 - shaking your nail polish bottle before applying the polish.
Well, for reason #1, the tip about cleaning your nails with vinegar which we have shared above will work the best. As for reason #2, the tip that all manicurists will give you is rolling your nail polish between your palms for a moment instead of shaking it vigorously. Shaking the bottle causes air bubbles to form up in the polish that end up on your nails and pop, leading to holes in your manicure.
12. Whiten Your Natural Nails With This Nail Soak
Want to flaunt your natural nails, but feeling embarrassed about the discolouration on them? Don't worry, this nail soak can make your natural nails look healthy and flawless if you pamper your nails with it regularly!
13. Use Rhinestones To Accentuate Your Plain Manicure
Turn your simple manicure to party ready manicure with rhinestones! Use a clear nail paint or nail glue to stick rhinestones on your nails. You can be as creative as you want to while placing the rhinestones on your nails!
14. Get A Marble Effect Nail Art With A Marker
Black and white marble effect nail art is absolutely elegant, isn't it? You can create distinct and abstract patterns of marble on your nails using a normal black marker and isopropyl alcohol! Check out the full tutorial of marble effect nail art in the video above!
15. Create Cool Geometric Designs With Scotch Tape

Don't have nail art striping tape? Don't stress! Just cut a few pieces of scotch tape thinly and place them on your nails according to the geometric shaped nail art that you want to create!
16. Paint Brushes Make Great Nail Art Brushes
Nail art brushes can be easily found in the markets, but if you have some old paint brushes with you, you probably don't need to invest on nail art brushes separately!
Furthermore, an old eyeliner or eyeshadow brush can also be used as a nail art brush to create different types of designs. You can cut the bristles of your paint brush or eyeliner brush to make a precise striping brush for your nail arts!
17. Create Glitter Gradient With Craft Glitter
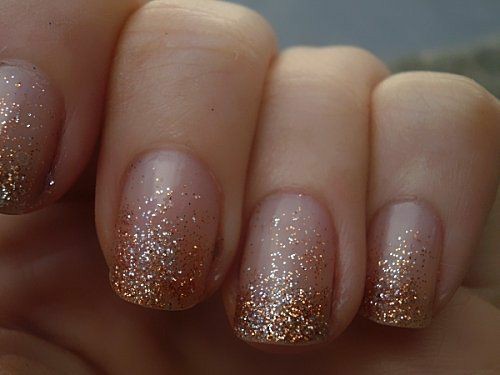
Revamp your plain manicure by creating a glitter gradient nail art with craft glitter! You can get a specific type of glitter made for nail arts from the market, of course - but if you don't have it, craft glitter would do too!
For a glitter gradient, paint your nails with a base colour and top it with a long lasting nail polish top coat. Next, apply the top coat again, but only on the area where you want your gradient to be, that could either be the tips of your nails or their base. Sprinkle some craft glitter right after applying the second layer of top coat for the gradient. That's all!
18. Keep Your Manicure Looking Fresh For Long With A Glossy Top Coat
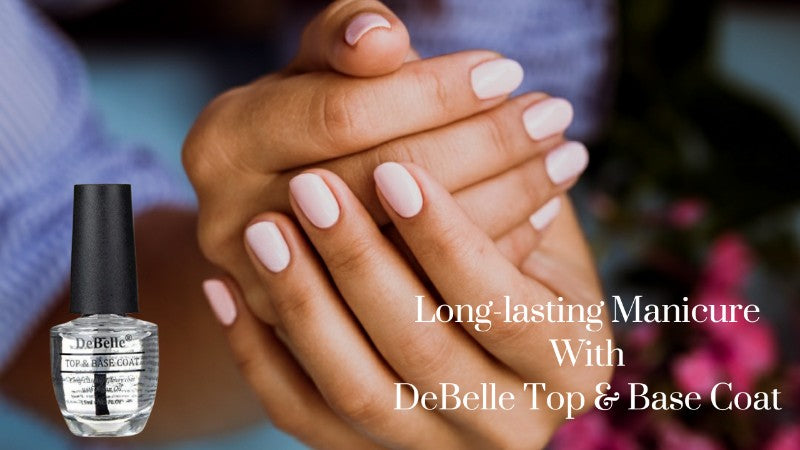
While doing a proper manicure at home, most of us tend to make a mistake of not sealing-in the manicure with a top coat to ensure its longevity and protect it from chipping! This step is totally a game-changing manicure secret of the best manicurists.
A top coat also makes the manicure appear glossy and fresh for days! Take a look at our DeBelle Top & Base Coat that serves dual purpose and gives your nail polish an immaculate finish! The top & base coat is enriched with nourishing argan oil, also popularly known as "liquid gold" which promotes the health of your nails.
Also check out: 6 Nail Art Designs With Just 1 Nail Polish
19. Make Your Own Pastel Nail Polish With A Lighter Shade

Want to create your very own pastel nail polish shade for a nail art that requires a pastel colour? Mix together a light nail shade with a darker shade of your choice - it is as simple as that! You can either mix them in an empty nail polish bottle or on a plastic sheet/spoon!
20. Use A Bobby Pin & Tip Of A Pen For This Kind Of Nail Art
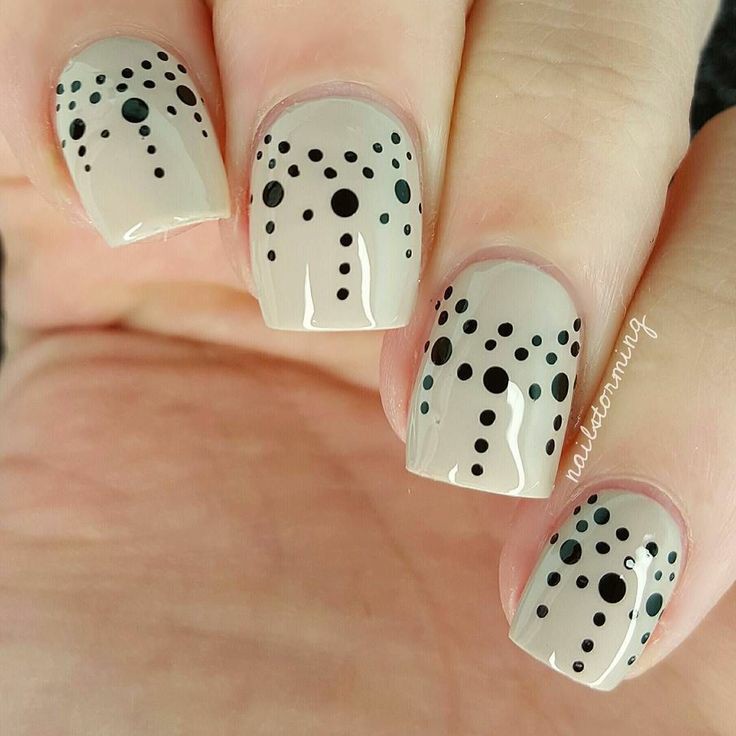
You can do an easy "dotticure" using a bobby pin and a pen to create unique patterns on your nails! Get as creative as you can with the patterns and the nail shades for this nail art.
21. Try Contouring Nail Art To Make Your Nails Appear Elongated

If you have broad nail beds, you can make your nails look more elongated and your fingers slimmer by using this nail contouring trend that we talked about in our blog post.
22. Want To Pamper Your Hands & Nails? Use This DIY Fizz Bomb
Fizz bombs are a whole lot of fun and they make your at-home manicure even more relaxing! Check out this DIY recipe of two-in-one mani + pedi bombs that have an invigorating fragrance of essential oils and the moisturizing goodness of jojoba oil and coconut oil.23. Make A Moisturizing Nail Polish Remover With Glycerine
Acetone - a chemical that is quite effective in removing nail polish, can also be a bit too drying for your nails and the skin around it! If you have a habit of changing your manicure frequently, you may be using acetone on your nails quite often that might be leaving them brittle!
Blogger LabMuffin has shared an easy DIY with which you can use acetone to remove your nail polish without worrying about ending up with brittle nails! You would need to mix acetone, glycerine and water in the ratio of 10:1:1.2 to make your own moisturizing nail polish remover!
24. Restore Your Old Nail Polishes With A Nail Polish Thinner
Got a few bottles of dried nail polish lying around? Take a look at this hack with nail polish thinner before you decide to throw them out!